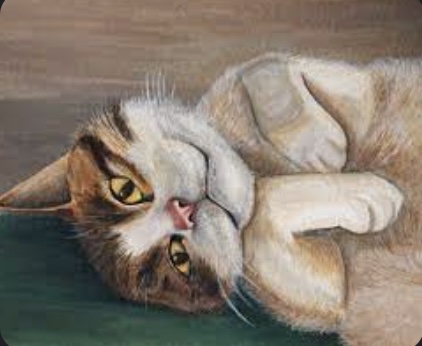
From Whiskers to Brushstrokes: How to Paint Your Cat in Watercolor

If you’re an artist who also happens to be a cat person, you’ve probably stared in awe at your feline buddy and wondered how you could do them justice on paper. No need to keep looking! From selecting a suitable reference photo to applying the final touches, this tutorial will help you paint a watercolor portrait of your cat.
You may use watercolor to create works in various styles, from photo-realistic to abstract. You can make a stunning replica of your pet with only a little amount of effort and time. Likewise, a beautiful painting of your cat, worthy of hanging in your house or giving as a gift, may be achieved with time, effort, and skill. Shop our premium watercolor sets bulk for unbeatable value. Elevate your art projects with a spectrum of vibrant colors. Perfect for schools, studios, or any creative venture.
Step 1: Get the Necessary Materials
A few basic materials are all you need to begin painting a watercolor masterpiece of your cherished feline friend. What you could require includes the following items:
1. Watercolor Paints: Watercolors are mixed on a palette before being painted.
2. Watercolor Paper: You’ll need some good, hefty watercolor paper containing no acid.
3. Brushes: Get several high-quality watercolor brushes in various sizes and shapes, such as a round brush, a flat brush, and a liner brush.
4. Water Container: You will need a large container to hold water to clean your brushes and dilute your paints.
5. Palette: You can use a palette to mix your watercolors before you start painting.
6. Pencil and Eraser: You should draw a preview of your cat before attempting to paint it.
7. Masking Tape: Tape your watercolor paper to a board or table with this so it doesn’t move around as you paint.
8. Reference Photo: Be sure you have a good photo of your cat on hand to use as a guide.
9. Tenacity and Originality: These are the fundamentals for any watercolor portrait of your cat.
Step 2: Create a Sketch of Your Cat
The second step in cat watercolor painting is to sketch it out. It will help you visualize your cat’s proportions and outline while you arrange the layout of your painting. Simple shapes like circles and ovals work well for this step as you lightly sketch the basic contours of your cat’s body and head. Once you have a sketch you like, you can intensify the lines and add finishing touches. Remember that your sketch is meant only as a reference and need not be perfect. The most critical part of drawing a cat is getting the dimensions and contours right to look like your cat.
Step 3: Determine Your Color Palette
A cat’s fur color and pattern will dictate colors for a portrait. If you want your painting to look realistic, match the cat’s natural colors as closely as possible. Consider the cat’s character and environment as you choose color selections. Your choice of colors will be guided by your tastes and the feline’s coat. Try out a variety of hues and see which ones complement your subject matter.
Step 4: Let’s Get the Base Layer Painted
It would help if you didn’t skip the base painting stage while giving your cat a new coat. The undercoat establishes a solid framework for the painting and serves as a springboard for highlighting your cat’s fur in all its glorious colors. Be patient and careful to prevent splattering paint and leaving brush strokes.
Step 5: Add Layers of Color and Details
The next step in creating a realistic and eye-catching painting of your kitty companion is to add additional layers of color and details on top of the basic layer. Highlights and shadows can be added after the base colors of the cat’s fur have been set. Think about how the light hits your cat’s fur, and use that knowledge to your advantage when choosing between light and dark paint colors. More customization is possible by including traits like eye color and whiskers.
Step 6: Finishing Touches and Final Details
Add the final touches and embellishments to your painting of your feline friend after you’ve added several layers of color and depth. Go through your artwork to see if any spots need more attention. If you need to tweak or polish the details, use a more precise brush. The colors should be effectively mixed, and highlights and shadows should be used to give the image depth.
Step 7: Don’t Be Afraid to Make Mistakes
Making mistakes is integral to learning how to paint your cat friend. Take your time with errors; doing so can result in insightful learning experiences that improve your painting. Put more effort into doing something rather than worrying about whether it turns out perfectly. Experiment with several techniques, hues, and surfaces to find the best suit for your painting.
Conclusion
The experience of painting your cat in watercolor can be gratifying and fun, but it demands time, practice, and attention to detail in the painting process. You will be able to make a painting of your feline companion that is stunning and incredibly lifelike if you follow the procedures that are explained in this article. Nevertheless, if you don’t have the time to do it yourself and would rather have it done by experts, you can look into Memorialize Art. They will paint your feline buddy in a watercolor that includes the features you want to be included and pictures of your cat’s personality.


