How to Extract Images From Office Documents

If you’re looking for a great suite of office programs, then Microsoft Office still reigns supreme.
But one of the many frustrations that the average user has with office documents is how to extract images from them. You’ve got an important meeting coming up and you find that it’s a huge strain to extract images from office documents!
This quick guide will show you the easiest ways for saving images from a Word document, Excel file, or PowerPoint presentation.
Here’s what you need to know:
“Save As…”
One of the easiest ways to save images from any Microsoft Office is to simply right-click on the image and save it.
This works in most cases unless the image is protected. However, the main downside of this method is that it’s not efficient. Only consider this option if you need to save up to 10 images at a time.
If your document, spreadsheet, or presentation has more than 10 images you need to find a more efficient way.
Let’s explore these methods in the next section.
Screenshot the Images
A faster way to capture the images is to simply screenshot the particular page. On a Windows computer, you can use Ctrl + PrintScreen to screenshot and save the images.
Later, you might have to use a program such as Photoshop, Picture Viewer, or even Paint to crop the images.
On a Mac, it’s much easier. You can use Apple + Shift + 4 to create the screenshot cursor. You then click and drag over the area and this will save the image to your desktop.
This is a fast and efficient process and will be much faster than having to save the images on your own.
Extract Using Zip
Still not happy with taking screenshots of the images?
There’s an even faster method to extract images from your Microsoft Office files.
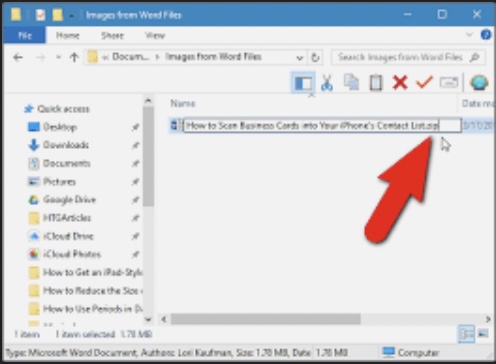
Save your file and give it a .zip extension. Once it gets saved as a zip file, use an unzipping application to open the file. This time, you’ll get a series of folders that make up the document, spreadsheet, or presentation.
One of these folders will be the Media folder. This folder will automatically save all images in one go.
This is the fastest method but you must ensure you have great unzipping software. The larger your files are, the longer it takes to unzip a particular file.
You can also look into services such as NPOI on how to configure an Excel file to extract images.
Get Images from Office Documents
Now you can extract images from Office documents and not have to stress about it.
If you’ve only got a few images then saving them manually is still the easiest and fastest method. If not, you want to consider taking screenshots of the file.
This method is much easier on a Mac where you don’t have the added step of having to crop the images. But the best way is to create a Zip file of your Office documents and then extract it to create a Media folder.
You can find similar software tips on our website.


