How To Make Vape Juice- Your 7-Step Process
Do you think you’re breaking your bank by constantly buying vape juice? Well, why not attempt to go DIY? Making your own juice can be a fascinating but tedious process if you don’t have enough experience.
Making your own vape juice is essentially about creating a personalized liquid suited to your taste and preferences. You have total control over the flavor and nicotine strength, and most importantly, you get to manage your weekly or monthly expenses efficiently.
We understand that you might want a detailed breakdown of the exact process. There are also some prerequisites that you need to begin. So we bring you our comprehensive step-by-step guide to making your very own vape juice!
What You Need Before You Start
Before diving into the step-by-step instructions, let’s ensure you have everything you need. Here’s a concise list of essential items to set up your homebrew vape juice station:
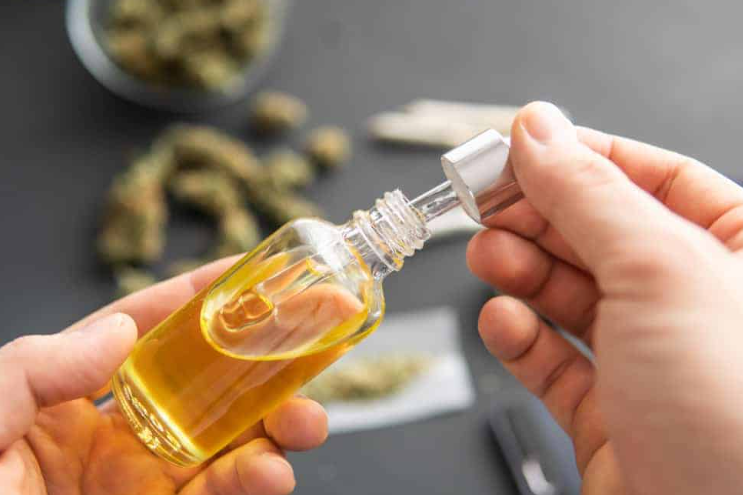
- Bottles: You’ve seen juice bottles before. They come in various sizes, from 5ml for testers to 30, 50, and 100ml for storing your favorite flavors. You can buy empty bottles or reuse your old ones if you still have them around.
- Measuring Containers: Necessary for larger batches, consider beakers if you plan to make more than 100ml at a time.
- Pipettes: Important for precisely measuring nicotine, PG, VG, and flavor concentrates.
- Gloves: Protect your hands from spills and nicotine absorption. Opt for powder-free gloves to make sure your mix is impurity-free.
- Tissue Rolls: A mere precautionary measure for quick cleanup of spills.
Making A Vape Juice- 7-Step Process
- Gathering The Ingredients
Let’s break down the crucial part: the ingredients you’ll use to craft your homemade vape juice. Surprisingly, vape juice doesn’t require many components. Here’s a list of what you’ll need:
Nic Shots
If you’re not aiming for nicotine-free vape juice, you’ll have to buy nic shots. There are various nicotine styles available, some with higher VG or PG content. Usually, most salt nics come in 50/50 PG/VG for a smoother vaping experience. Typically, you’ll find these in 10ml bottles but you can also find ones of higher quantity online.
PG/VG Liquid
Aside from nicotine, these are the core components of any blend of vape juice. Propylene Glycol (PG) and Vegetable Glycerine (VG) are harmless organic liquids used in various products, including medical and confectionery items.
PG is thinner, delivers flavor effectively, and provides a noticeable throat hit. VG is thicker, which makes the clouds. This ensures how smoothly the juice will vaporize in the inhale. While most blends use both, some sub-ohm vapers opt for 100% VG vape juices. A small amount of PG can enhance flavor without making the inhale harsh.
Flavor Concentrates
Now that you have nicotine and VG/PG, let’s talk about flavor. It’s best to source flavor concentrates from reputable vape retailers. There’s an extensive range of flavor concentrates available online.
You have total freedom to mix, match, and blend them to create your desired vape juice flavors. Use your judgment, for example, blueberry and cherry are likely to complement each other, but tobacco and cotton candy might not be the best pair.
- Get Your Measurements In Check
How much vape liquid are you aiming to produce today? What nicotine strength are you targeting? Are you leaning towards a thinner PG-based vape juice or a thicker VG-based one? These are some of the questions you need to ask yourself before you start mixing.
To begin, ensure you have a vape juice calculator at your disposal. You can find various options available for download or use in your web browser. These calculators come with fields where you input essential information, such as your desired volume, nicotine strength, VG/PG ratio, and more.
Once you’ve filled in these details, the calculator will promptly provide you with the precise quantities of each fluid you’ll need.
- Creating the Base Mixture
This is the initial stage of crafting a potentially outstanding vape juice. It’s time to put those gloves on! Using the syringes, based on your earlier calculations, extract the specified amounts of PG and VG. Add these liquids to the beaker you’ve chosen for your blend. After using each syringe, make sure to thoroughly rinse it to prevent any residue buildup contamination down the line.
- Add Flavor
At this point, you have a batch of vape juice that’s entirely flavorless. While it’s technically vapeable, it will just be smoke. PG lacks flavor in its raw form, and VG carries only a hint of sweetness.
Although vape calculators do consider the amount of flavor concentrate needed, this aspect of the brewing process is more experimental. You have to determine the intensity of flavor you desire.
As a general rule of thumb, if concentrates account for 5% of your vape juice, you’ll achieve a very subtle flavor. On the other hand, 20% can result in a flavor that can be somewhat overpowering or overly sweet for some palates. This is presented in terms of ‘percentage’ because the specific quantities in ‘milliliters’ will vary depending on the volume you’re creating.
- Add Your Choice of Nicotine Dose
Now, it’s time to be cautious as nicotine is a potent substance. Getting the dosage wrong can lead to a vape liquid that’s too strong and overwhelming.
Keep in mind that the nicotine strength should be adjusted based on the total volume of vape juice you’re producing. For instance, adding a single 10 ml shot of 18mg nicotine solution to 50 ml will result in 60 ml with a nicotine strength of 3mg. While this might seem a bit complex, the available calculators will provide precise guidance on the required nicotine amount.
- Blend and Store
Now that your mixture is in the beaker, it’s time to mix it thoroughly. After that, use a fresh syringe to transfer the blend from the beaker to your chosen storage bottle or bottle. If you’re using multiple bottles, be sure to stir the mixture well in the beaker to ensure consistency in each small bottle. Shake well before moving on to the next step.
- Be Patient While Your Mix Matures
While your vape juice is technically ready for vaping, it won’t taste as good as you’ll want it to. Vape juice requires time to steep, allowing the flavors to fully develop and intensify throughout the liquid.
Place your vape juice in a cool, dark spot like a cupboard, preferably with the lids off. Allowing your vape juice to breathe will darken it and enhance the flavor significantly. Typically, you’ll need to wait around 4-5 days for optimal results, so hopefully, you have something else to puff on while you wait.
Conclusion
There you have it, that’s the entire process! As you can see, once you have all the necessary equipment, it’s a matter of basic chemistry and a bit of patience that opens up a wide world of personalized vape flavors.
We are hopeful that this guide will be enough to tell you that making vape juice is an intricate process. Share your recipes online for other fellow vapers to try out. The vaping community is all about creativity and progress. We hope your first vape juice is as good as the ones you buy off the shelf.