How to Make Your Own Custom Washi Tape Design at Home
You on how to make your own custom washi tape design at home. You don’t need any fancy tools or materials for this DIY project – just your creativity and some basic supplies that can easily be found in any craft store or online. By the end of this tutorial, you will have a unique and personalized washi tape design that’s perfect for all your creative endeavors.
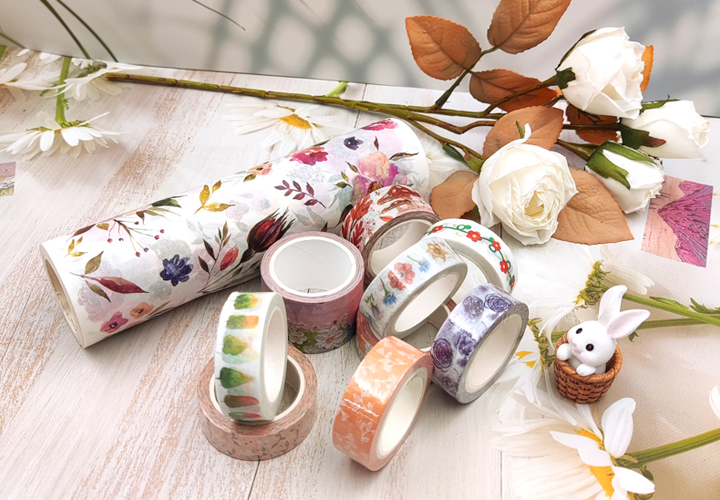
Understanding Washi Tape
Washi tape is a type of decorative masking tape that originated in Japan. It is made from natural fibers such as bamboo or hemp, giving it a unique texture and feel compared to other types of tape. The word “washi” itself means “Japanese paper,” which reflects the traditional production methods used in creating this versatile craft supply.
Washi tape can be used for a wide range of creative projects, such as scrapbooking, card making, and home decor. Its unique properties make it easy to tear by hand and reposition without damaging the surface it’s applied to. This also makes it ideal for adding small details or accents to your projects without having to worry about precision cutting or messy adhesive residue.
When selecting washi tape for your project, consider the color scheme and design you want to achieve. While some washi tapes feature simple patterns like stripes or dots, others include intricate designs such as florals or characters. Choose washi tape that complements your overall project design and colors.
Choosing the Design and Materials
The first step in making your own custom washi tape design is to choose the design and materials. The best thing about making your own washi tape is that you have complete control over the design. You can choose any color or pattern you like, and even combine different patterns for a unique look.
When choosing the materials, you want to make sure that the adhesive on the back of the tape is strong enough to hold up over time, but not so strong that it damages surfaces when removed. You also want to make sure that the tape is easy to cut and handle.
Consider using high-quality washi paper as a base for your tape, as it is durable and easy to work with. Additionally, you can use stamps or stencils to create intricate designs or add texture. With so many options available, choosing the perfect design and materials for your custom washi tape can be a fun and creative process!
Preparing the Acrylic Keychain
Before applying the washi tape, you need to prepare your acrylic keychain. Start by cleaning it thoroughly with soap and water. Rinse it off and dry it completely with a soft cloth to avoid any residue or dirt marks on the surface.
Next, use sandpaper or a nail file to gently rough up the surface of your acrylic keychain. This helps give the tape something to adhere to and makes it less likely that it will peel off over time. Be careful not to over-sand, as this may damage the surface of your keychain.
After sanding, use a small piece of masking tape or washi tape to cover any part of the surface you don’t want covered in your final design. You can also use stencils or templates if you want specific shapes or patterns on your design.
Preparing the Washi Tape for Application
Before applying your custom washi tape design to the acrylic keychain, it’s important to properly prepare the tape. Start by cleaning the surface where you will be applying the tape. Use a microfiber cloth and rubbing alcohol to ensure that there is no dust or debris on the surface that can interfere with adhesion.
Next, carefully remove any backing or liner from your washi tape. It’s important not to touch the adhesive side of the tape as this can transfer oils from your fingers and negatively impact its sticking power. Once you have removed all backing, carefully align and apply your custom design onto the acrylic keychain surface using even pressure and smoothing out any air bubbles.
Applying the Washi Tape to the Acrylic Keychain
Now that you have your custom washi tape design ready, it’s time to apply it to the acrylic keychain. Start by cutting a piece of washi tape that is slightly longer than your keychain. Carefully peel off the backing from one end of the tape, being careful not to touch the sticky side with your fingers. Align this end of the tape with one end of the acrylic keychain and press down firmly.
Slowly continue peeling off the backing and press down gently on the tape as you go, making sure there are no air bubbles or wrinkles. If necessary, use a small tool like a credit card or plastic spatula to smooth out any bumps in the tape. Once you’ve covered one side of the keychain with washi tape, repeat this process for any other sides or edges that you want covered.
When applying washi tape to an object like an acrylic keychain, it’s important to take your time and work carefully to ensure a smooth application. Don’t be afraid to start over if you make a mistake or if there are air bubbles that can’t be smoothed out. With practice and patience, you’ll be able to create beautiful custom designs on all sorts of objects using this versatile crafting material.
Adding the Key Ring
Once you have applied your custom washi tape design to the acrylic keychain, it is time to add the key ring. This is a simple process that can be done in just a few steps.
To add the key ring, simply take your pliers and open up the metal loop on the key ring. Then slide the loop through the hole at the top of your acrylic keychain. Once it is in place, use your pliers to close up the metal loop on the key ring securely. You want to make sure it is closed tightly so that your keys don’t accidentally fall off!
With your new custom washi tape design acrylic keychain complete, you are now ready to proudly display it on your set of keys or use it as a fun accessory for your purse or backpack. Feel free to experiment with different designs and colors of washi tape to create unique and personalized designs for yourself or as gifts for friends and family.
Tips and Tricks for Creating Your Own Washi Tape Design
Creating your own custom washi tape design can be a fun and rewarding experience, but it can also be challenging. Here are some tips and tricks to help you get the most out of your DIY washi tape project:
1. Experiment with different materials – Don’t limit yourself to just using washi tape! Try incorporating other materials such as stickers, stamps, or even paint to create unique designs. You can also mix and match different patterns and colors to create a one-of-a-kind look.
2. Use a light touch – When applying the washi tape or other materials to your project, use a light touch to avoid tearing or wrinkling the tape. Start on one end of the project and work your way across slowly, smoothing out any bubbles or wrinkles as you go.
3. Get inspired – Look for inspiration in everyday objects such as flowers, leaves, animals, or landscapes. You can also draw inspiration from art movements such as Art Deco or Pop Art.
4. Practice makes perfect – Don’t be discouraged if your first few attempts don’t turn out exactly how you want them to. Keep practicing and experimenting until you find the perfect combination of colors, patterns, and materials that works for you.
5. Have fun with it! – Remember that creating custom washi tape designs should be an enjoyable process that allows you to express your creativity in new ways. So relax, have fun with it, and don’t take yourself too seriously!
Conclusion
Making your own custom washi tape design at home can be a fun and rewarding experience. Not only do you get to create something that is unique to you, but you also get to express your creativity in a tangible way. With the right materials and a bit of patience, anyone can make their own washi tape design and apply it to various surfaces. So go ahead and give it a try – you might be surprised by how much enjoyment you get out of it!